Photobucket Photobucket Photobucket Photobucket

Monday, June 24, 2013

Weekly Bump Photos (Week 31)


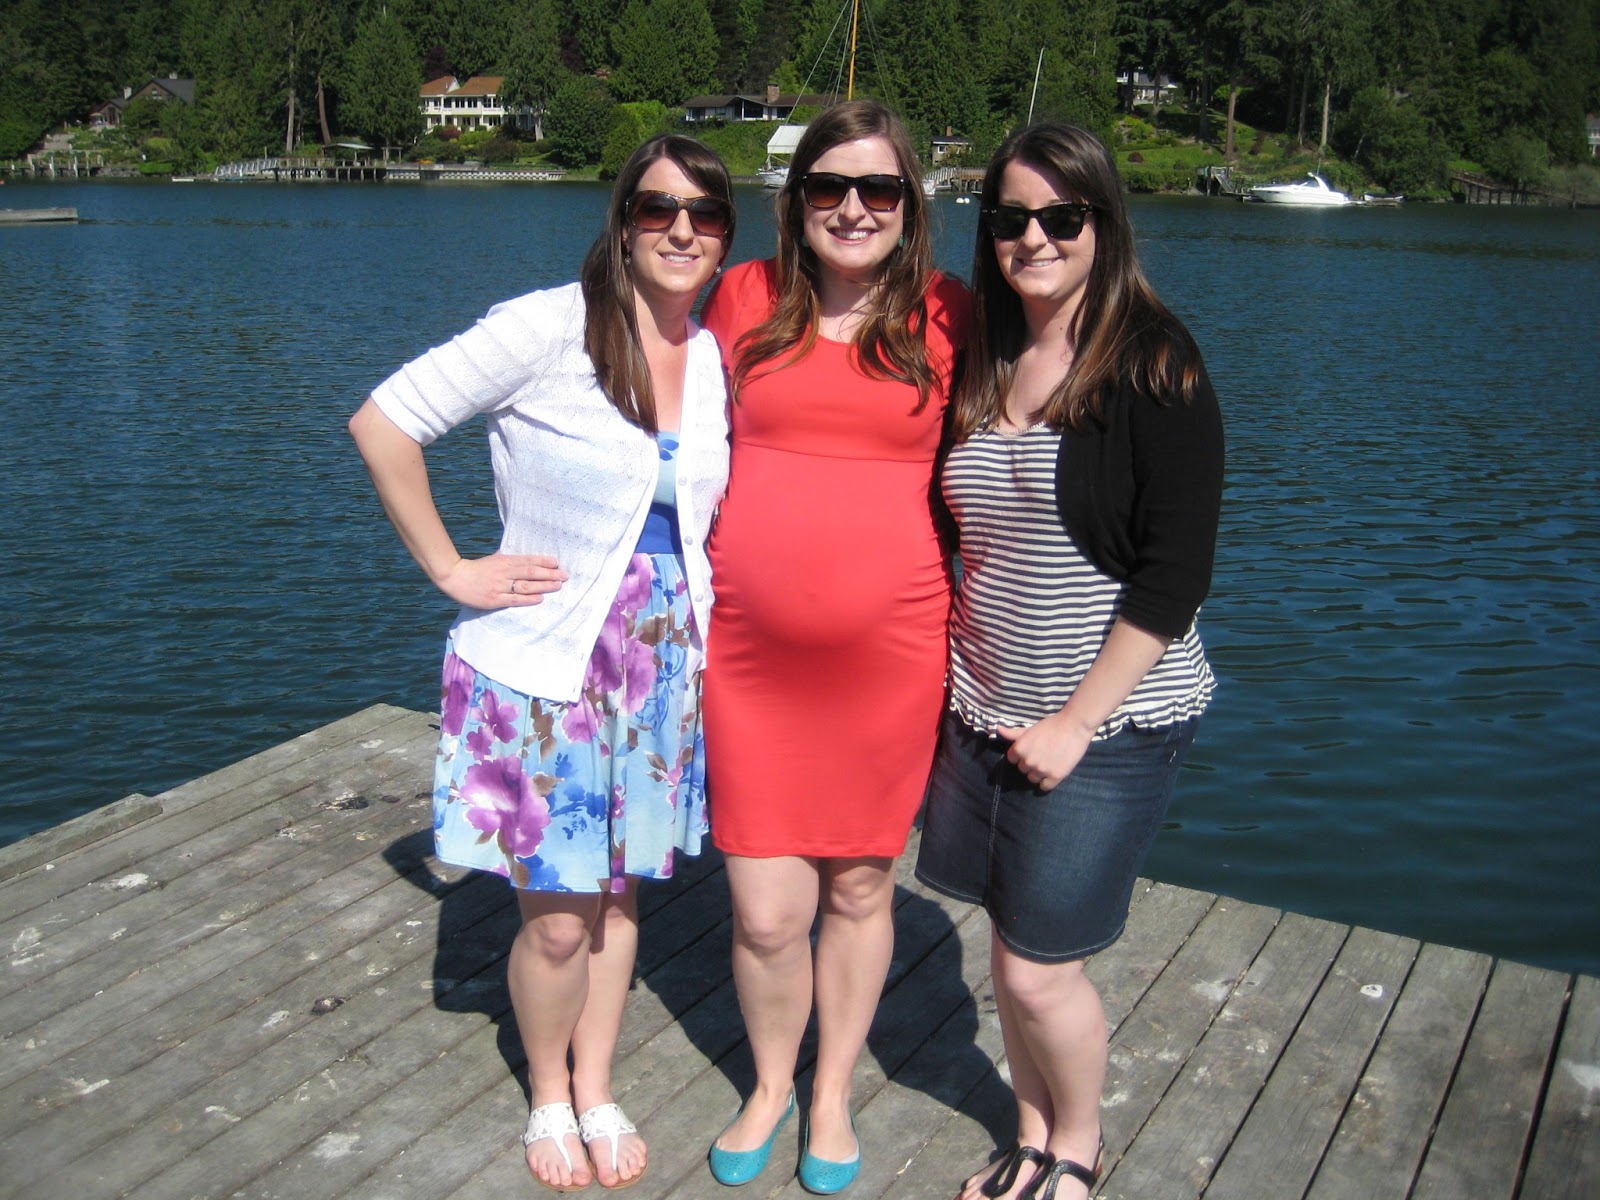
Here we are - week 31! I can't believe we have only nine weeks to go. Whoa. How did that happen so fast?! It really is amazing. When you start out, it seems like so far away, but it really does go by so fast. I can't wait, but at the same time a lot needs to happen in the next 9 weeks! Packing, moving, oh yeah, and finding a place to live first... there's that. Setting up the nursery, getting some more gear, going to baby class... the list goes on!... It's going to be a quick hot summer I'm sure!
PS see my awesome burn lines in the photo above? I did wear sunscreen for the record, but the beach was just too hot I guess. I'll post our beach photos from Seaside this week! :)
31 Week Interview
How far along? 31 weeks... we're in the single digits - 9 weeks to go!!! EEEEK!
Baby’s size? Pineapple (are you a fan of delicious flavor?) 15.2 to 16.7 inches, 2.5 to 3.8 pounds!
Days until next doc appointment? Ultrasound on Friday and regular appointment on Monday. I had my last appointment last week for the glucose test. I have to say, it wasn't as bad as I thought. I must have hyped it up in my head more than I needed to. I had the orange flavor of the "sugar juice" and it kind of tasted like Tang (remember Tang?). Well, good news - no gestational diabetes! Woot woot!
Total weight gain/loss? 18 lbs
Maternity clothes?  You know you are in the home stretch when your maternity clothes start getting uncomfortable and tight... time to go shopping again!
Stretch marks?  None so far. 
Sleep:  I got the Snoogle and I'm so glad I did. It's helping my tummy be a little more comfortable. I'm still tossing and turning a lot though.  
Best moment this week:  Finding out Little Miss was measuring well and hearing her heart rate (it was awesome too!). Also, finding out no gestational diabetes (booyah). Also, celebrating at my work shower with my BP ladies! Had so much fun!
Movement:  She's my active little spitfire! She tends to kick me most on my right side, which I think we decided is where her little tush is. And I'm feeling more movement up top and center. I'm thinking she is moving and getting ready to go head down in a few weeks - eek! 
Food cravings:  Last week I was feeling the hamburgers. I think we had hamburgers, tacos, meatloaf, and spaghetti all with ground beef - haha! Gotta get that protein!
Anything make you queasy or sick?  Still eggs.
Have you started to show yet?  Getting bigger and bigger. And more uncomfortable.
Missing anything?  Being able to bend over easily and pick something up. If I drop something these days, then I'm asking Zach to pick it up for me or waiting until I absolutely have to. :)
Gender: Little Miss.
Labor signs?  None yet
Belly button: We're at about half innie/half outie status... still! I honestly can't wait til it pops completely out. If it doesn't, I will be very disappointed. I want to see what it's like! 
Wedding rings on or off?  On
Happy or moody most of the time?  So happy! Getting more and more anxious (did I mention we are in single digits?!?!) but can't wait til she is here. 
Weekly symptoms:  Leg cramping, exhaustion, heartburn, swelling feet... you name it!
Looking forward to: Seeing her at my next ultrasound on Friday! Also, finding a new place to live... working on it this weekend (send good thoughts our way please!). I think once we get moved, I will feel a lot better about her coming and I will be able to actually feel ready for her to come!

Thursday, June 20, 2013

DIY Nursery Art - Hot Air Balloons


I whipped up this super easy hot air balloon art for the nursery. I already had the frame on hand courtesy of the clearance section of Target and used my favorite nursery as inspiration (from Craftiness is Not Optional). 

Supplies:
- Scrapbook paper in coordinating patterns
- Frame
- Double sided tape
- Craft glue (I used gorilla glue)
- Pen

Step 1: Cut out your balloons and baskets. I thought I had a circle punch, but couldn't find it so just traced a spool of thread and cut each little circle out by hand. I cut two circles of each pattern I wanted. I just free handed the basket and then used one as a template to cut out the rest in the brown paper.

Step 2: Figure out where you want the ballons to be (spacing, etc.) on your background paper (I just used a white piece of cardstock for the background). Then use the double sided tape to stick one of the balloons of each pattern on the background paper. Stick the baskets a little below the balloons.

Step 3: Grab your pen and draw on your balloon strings. I freehanded, but you could use a ruler too, to be extra straight.

Step 4: Glue on the top balloon piece. I first took the top circle for each balloon and bent it a little bit so it curved up. Just enough to give it a little dimension. Then I applied a thin strip of gorilla glue to the middle of the bottom circle and applied the slightly bent circle to give it the 3D effect. 

Step 5: Frame it up! After letting it dry for a good 24 hours, I put it back in the frame and hung that baby up.

Total time: about 15 min (plus drying time)
Total cost: scrapbook paper was probably a couple bucks


This was such an easy and fun project! I love how it turned out and think it will look great in the nursery, especially with the complementary hot air balloon mobile.  

I'm thinking of spray painting the frame white before I hang it in the nursery, but for now I'll leave as is. One more nursery project down!

Wednesday, June 19, 2013

Coral Dresser for the Nursery


She's DONE!!!

Excuse the tarp and the deck... This is most likely where she will stay until we move in a month or so (still working on where we are moving to...) with the tarp over top (and covered by our awning) in case of rain. 

Isn't she pretty?!?! I'm kind of in love. Well, not kind of. Seriously. Seriously in love.

Here's a quick before and after before we get in to the nitty gritty.

Here's my original post about the dresser progress. I might recap a little bit here too... We started out with my $100 Craigslist find. The brass knobs were a worn dark brown and there were quite a few scratches and nicks. 

After sanding...

And after priming...

It was time for paint! I chose the color Youthful Coral from Behr and got a pint in the Interior Semi-Gloss Enamel (and No-VOC for the nursery). I mostly used the 1.5 and 3 inch brushes. I splurged a bit and bought the Purdy brushes, since I'd heard they were such good quality and helped show less brush strokes. There were still a few visible brush strokes, but only if you got close after 3+ coats.

First coat...

Second coat...

Third coat...

Touch ups on the top (fourth coat)... I used a small foam roller for the top on the third coat, but it didn't cover as nicely as I liked, so I used the large brush to do one good final coat and it turned out great.

Next up was attacking those knobs. I had heard about Brasso from this blog (and one of my inspiration dressers) and it worked like a charm! I enlisted Zach to help me polish up the handles since I heard it was really smelly and didn't want to be around it in my "condition." :) It probably took about an hour to get all six of the long drawer handles (and various pieces) polished. Not easy work and a lot of scrubbing, but for $2 and a little elbow grease it was well worth it! Check out the difference it made.

I could not handle the ring knobs on the middle drawers though. They kept reminding me of the nose rings that you would see on a bull. Even when they were spruced up. No thanks. So for the middle drawer knobs, I bought two sets of three each while I was in Arizona at Hobby Lobby (similar to these ones and these ones from Anthro). The knobs at Hobby Lobby are so much more reasonably priced and they have a lot of the same styles as Anthropologie. They cost around $3.99 each, but were 50% off when I bought them! I decided on the white flower shaped knobs because they looked awesome and the aqua polka dots were a little too much with the coral dresser. Plus, the white flower shaped knobs matched the flower design on the original knobs.

I did end up leaving the base part from the original ring shaped pulls. I liked the flower shape and it made it so I didn't have to do any hard core sanding and/or refilling of the grooves that they left on the drawer fronts.

I also decided to paint over the brass decals that were along the bottom. I originally had the two squares on either side taped off, but didn't like the hard contrast once the rest of the dresser was painted. I like them painted the same color much better - still keeps the detail, but doesn't distract from the rest of the dresser's fun details.

You may notice that she has a middle leg, which I kind of forgot to paint (see it in the picture below? Still brown. Oops!). I don't know if I could have reached it even if I did remember it, but I think I'm going to be lazy and just leave it for now. Unless I can convince my lovely husband to get down there and give it a quick coat or two. Obviously it's not super noticeable or else I would have done it in the first place! Haha.

I was also thinking about doing a top coat of polyurethane to really seal and protect the piece, but the enamel semi-gloss is pretty sturdy and I think it should hold up well. At least for now. Honestly, I'm so glad I'm done with this piece now and that I started when I did because I am getting so uncomfortable. To have to bend over and paint any more would not be fun. I was getting really out of breath towards the end! Especially since I was fully clothed, gloved and had my surgeon-grade face mask on (safety first!).

The only thing I still want to do is get some fun paper to line the drawers. Maybe a fun pattern or even some pretty florals? I'll be sure to post an update when I get around to it!

I'm so pleased with how it turned out! I think it will look amazing in the nursery (which I can't wait to get all set up!). Here's another before and after just for funsies. I love seeing the dramatic change. So much fun.

What are you working on these days? Any fun DIY projects? I feel like I'm in full on nesting mode right now and want to make a ton of stuff! Next up for me is a DIY pouf ottoman

Monday, June 17, 2013

Weekly Bump Photo (Week 30)


Thirty weeks!!! Booyah! I can't believe we are already at this point! Only ten weeks to go and I'm feeling pretty good. A little freaked out about everything that has to get done in the next ten weeks... but I know it will all work out. Someone asked me this weekend if we were ready for baby girl if she came now and the answer is definitely no! We still need to stock up on a lot of items (the main one being the car seat so we can bring her home!) and find a bigger place. Eeeek! My goal this week is to get more packing done - mostly my clothes that I won't even be able to wear the next few months anyways. 

Funny story from this past week at work (well, kind of funny):
Guy at work: "So, you have a couple weeks left?"
Me: "No... not due til the end of August..."
Guy at work: "Oh. So... twins then?"
Me: "Um... No. Just one in here."
Me: Walks away and cries when out of sight. (OK, no, not really. There were no tears, but I was definitely in a funk the rest of the day!)

I mean, I know I'm looking bigger, but that big?! I half laughed it off and half sulked in my own pity for the rest of the weekend day. Oh well. At least I look big because I'm prego and not just because... I guess?

It definitely reminded me of this. Guys, it's never OK.

No interview this week since not much significant has changed besides me getting slightly bigger and more uncomfortable. I did break down and get one of these though (not a Snuggie, but a Snoogle!). It was recommended by my friend, Sydney, and I thought it was worth a try since my sleeping has been increasingly uncomfortable. So far after two nights, I'm digging it. It's a little weird to get used to, but I think I will like it a lot. It definitely gives me more support on my belly and back, which is great.

Also, a big Happy Father's Day to my awesome hubby. He's my favorite Baby Daddy and I know he is going to be the most loving, fun, and caring Daddy! Happy Father's Day to all the other Daddys, Daddios, and Pop Pops out there!

Thursday, June 13, 2013

Baby Shower!

Last weekend was our baby shower for Little Miss BK. My Mother In Law, Renee, and our family friend, Rhonda, hosted the shower at Rhonda's beautiful house on Bainbridge Island. It turned out to be such a beautiful day - the sun was shining and we had a great turnout. So many fun stories and memories! It was such a great day!

The cake was beautiful! Renee even got the design to match the plates and napkins!

We played the "Can't Say Baby" game. You've probably heard of it. Everyone got a little pink clothespin when they came in and if you said Baby and someone can steal your pin. Whoever had the most pins at the end won (Kristy was the big winner)! I thought I would be set since I call her Little BK but no, I was out so fast. :)

Beautiful peonies!


Two GGs! Aka two Great Grandmas!

Our two FABULOUS hosts, Rhonda and my mother in law, Renee!

Besties.

The Kane women.

Four (3 and 2/3) generations!

Best friends since 3rd grade!
My Gonzaga ladies!
GG, me and my Mama.
Auntie Jenn


Lots and lots of generous gifts! So many homemade things, too. So blessed!

Shan knit some little booties and an amazing blanket!

Tons of clothes - she is going to be stylin'!
Gramma Vonnie got her a mini radio flyer!

Zach showed up at the end - he went golfing with the guys while the ladies had fun!

 We also played the "measure the belly" game and Mykell won! Fun fact: she also caught the bouquet at our wedding!

Kristy made a super soft and sweet quilt!
Everyone wished they made this little star romper in our size! Plus baby Keens!

Such a special quilt from Rhonda. The stitching even said "Baa!"


My beautiful friends!


Sisters!

Auntie lovin'!

Thank you, thank you, thank you to all our family and friends! Thanks for your friendship, love and support throughout the years. We are so blessed to have such a great support system for Little BK when she enters this world! 

LinkWithin

Related Posts Plugin for WordPress, Blogger...